Member Contributer Cogswell Posted January 6, 2017 Member Contributer Share Posted January 6, 2017 45 minutes ago, 3dcycle said: well just set the wheel on tonight its not tight yet I am waiting on my shock from Jamie D tracking number says tomorrow so yippie... so I am in need of some new lug nuts, 5 blue ones and it will match my clutch, anyone got some or got a ebay link to the right ones to get? also I am about to push the button on lowering foot pegs for myself. the knight design ones look really nice but for $200 shipped is there anything else out there? maybe I don't need the ones with the rubber on them? anybody got any ideas? That's going to be smokin' hot all right. If you want to lower the stock pegs you can get the peg lowering blocks right here from BusyLittleShop. They bolt right on. Love 'em. I don't recall exactly what I paid, but you can get a lot better deal than $200. I thought he might have some photos of them in his gallery, but all I see are hot girls and hot bikes! Go figure . . . LOL! I can scrounge up a photo of mine if that helps. Link to comment Share on other sites More sharing options...
Member Contributer 3dcycle Posted January 6, 2017 Author Member Contributer Share Posted January 6, 2017 that would be great, I will look him up too thanks Link to comment Share on other sites More sharing options...
Loftust Posted January 6, 2017 Share Posted January 6, 2017 You may find that pegs without rubbers transmit more vibration; I opted to retain the OEM items on this basis. Your bike is looking bloody good though, even though it's not quite completed - what is the finish on the powdercoating called? Link to comment Share on other sites More sharing options...
Member Contributer 3dcycle Posted January 6, 2017 Author Member Contributer Share Posted January 6, 2017 the black is a textured black I forget the exact name but will get it tonight. the white is a mirage white suppose to have a sparkle to it (it has pearl in it) but it don't sparkle after baked, I did something wrong will have to get hold of the company about it. I did follow their directions perfectly (maybe that's what I did wrong) thanks for all the complements so far. I hope to get home and find a shock waiting for me tonight Link to comment Share on other sites More sharing options...
Member Contributer 3dcycle Posted January 6, 2017 Author Member Contributer Share Posted January 6, 2017 son of a bit** just tracked the package and now it wont be here until Tuesday freaking fed ex says its in Fort Wayne ,IN there goes my weekend Link to comment Share on other sites More sharing options...
duccmann Posted January 6, 2017 Share Posted January 6, 2017 Dang gummit, hate when that happens-- probably weather related. I'm drooling already Sent from my iPhone using Tapatalk Link to comment Share on other sites More sharing options...
Member Contributer dgordon Posted January 7, 2017 Member Contributer Share Posted January 7, 2017 Dang, there goes mine too. This is now a daily check for me. :-) Link to comment Share on other sites More sharing options...
duccmann Posted January 7, 2017 Share Posted January 7, 2017 I remember mine to got a little delayed from Jamie, but ITS worth the wait.Sent from my iPhone using Tapatalk Link to comment Share on other sites More sharing options...
Member Contributer 3dcycle Posted January 7, 2017 Author Member Contributer Share Posted January 7, 2017 Fed ex dropped the ball on this. I went from being pumped to make some progress to pissed and depressed in like 2 seconds. Link to comment Share on other sites More sharing options...
Member Contributer RC51Nick Posted January 7, 2017 Member Contributer Share Posted January 7, 2017 One thing nice about being in the Ft.Wayne area.... Jamie is local... Now to just get over to his shop and buy some suspension parts!! Link to comment Share on other sites More sharing options...
Member Contributer Cogswell Posted January 7, 2017 Member Contributer Share Posted January 7, 2017 On 1/5/2017 at 5:43 PM, 3dcycle said: that would be great, I will look him up too thanks Sorry this took so long . . . These allow the pegs to function as stock folding normally. I removed the feeler and replaced it with a socket head bolt so it wouldn't be touching the pavement too soon. One thing you'll run in to is that the side stand will come up and hit the peg. To solve that, in the last photo there is a small bolt (IIRC 4mm) that I installed on the back side of the stand where it comes up and contacts the stop. The bolt head spaces the stand down a bit to prevent it from hitting. To do that I removed the stand and used a drill press to drill a blind hole, then tapped it. Once the bolt was threaded in I used a file to get the thickness just right to keep the stand just clear of the peg. Once I had it where I wanted it I backed it out and used a tiny drop of blue Loctite on final assembly. It's been working great for 20,000 miles. On the other side the stop light switch and master cylinder pushrod length are an issue. There I used a Dremel to shorten the rod a couple of threads and a split ring on the spring for the light switch to prevent the brake light from being constantly on. These have made a big difference for me on long rides. It doesn't seem like much, but that extra inch gives the legs and knees enough additional room for comfort. I hope that helps. Keep the photos coming - love seeing them. Link to comment Share on other sites More sharing options...
Member Contributer 3dcycle Posted January 7, 2017 Author Member Contributer Share Posted January 7, 2017 Thanks for the info. Gives me something to think about Link to comment Share on other sites More sharing options...
Member Contributer 3dcycle Posted January 10, 2017 Author Member Contributer Share Posted January 10, 2017 Just checked my shock got dropped off at the house this morning. Will make for a good night in the shop for sure. oh yea and I experimented with a new coating last night on a lot of hardware. I hope it looks good I don't think I have the equipment to take it off now. Link to comment Share on other sites More sharing options...
Member Contributer 3dcycle Posted January 11, 2017 Author Member Contributer Share Posted January 11, 2017 I got my shock mounted up tonight with my extended hose. Then a mount that I found that I hope will look good once all done. I can change the height and angle of it when I get bike closer to being done. Link to comment Share on other sites More sharing options...
CandyRedRC46 Posted January 11, 2017 Share Posted January 11, 2017 OOOOOOOfffff sexy. Now time to do something about those ugly dual rear brake lines :) Link to comment Share on other sites More sharing options...
Member Contributer 3dcycle Posted January 11, 2017 Author Member Contributer Share Posted January 11, 2017 in stages. I was just looking at them last night but the money is getting tight. I will take care of them when I unleash power and do a full tyga system Link to comment Share on other sites More sharing options...
Loftust Posted January 12, 2017 Share Posted January 12, 2017 Drool... It's such a shame that the chain guard is so f-ugly and ruins the look of the beautiful swingarm. Link to comment Share on other sites More sharing options...
CandyRedRC46 Posted January 12, 2017 Share Posted January 12, 2017 23 hours ago, 3dcycle said: in stages. I was just looking at them last night but the money is getting tight. I will take care of them when I unleash power and do a full tyga system Honestly the delink is more elbow grease and ingenuity, than money. I was able to reuse one of the existing rear brake lines and make a loop out of the second one. Up front I am sure you could do something similar, but you would be better off doing a front end swap. I was able to find an already R1 swapped front end off of a 4th gen that supposedly hydrolocked it's engine for $500 and then sold my front end for about the same price, so I didn't really spend anything. You could do the same, but it takes some luck/planning/good timing. Link to comment Share on other sites More sharing options...
Member Contributer 3dcycle Posted January 14, 2017 Author Member Contributer Share Posted January 14, 2017 that might happen down the road, but for now I will stick to unleashing everything vfr stage 1 so some more of stage 1 just running some wires here, got my heated grip, autocom, gps, volt meter and air horn run through the fuse box run though a 30 amp relay that is triggered when I turn the key on. got my trigger power from the power going INTO brake light switch always has power when key on. I also have a battery tender lead hooked into the fuse box, 2 leads are hot when the key is off this way I can keep the terminals on the battery clean with minimal connections, hate a clustered battery. sebspeed did a great job on my new plate mount for me. still need to tuck some more wires, but I think next it to start polishing some exhaust pipe and getting that beast ready to go. also need to pull the mufflers apart I think maybe the packing done burned up in the 20000 miles I have had them (they came from my other bike) they are getting a bit raspy, any ideas on how to make laser extremes throatier than normal. besides replacing them? Link to comment Share on other sites More sharing options...
Member Contributer dgordon Posted January 20, 2017 Member Contributer Share Posted January 20, 2017 I don't know about the rest of the esteemed board but I'm going nuts waiting to see what's next with this build. Dave Link to comment Share on other sites More sharing options...
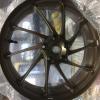
Member Contributer 3dcycle Posted January 20, 2017 Author Member Contributer Share Posted January 20, 2017 Fine here you go. started with this Link to comment Share on other sites More sharing options...
Member Contributer 3dcycle Posted January 20, 2017 Author Member Contributer Share Posted January 20, 2017 Got them cleaned up a bit. All parts polished now. Took about 20 hours all in this weekend this is at about 1200 grit sand paper, I took it to 1500 then used high speed buffer to shine her up. more pictures in a bit Link to comment Share on other sites More sharing options...
Member Contributer 3dcycle Posted January 20, 2017 Author Member Contributer Share Posted January 20, 2017 I am pulling the mufflers apart now to repack them, trying to get some of the raspy sound out of it for more of a deep tone. hope fully it will work out with some new packing material. Link to comment Share on other sites More sharing options...
Member Contributer dgordon Posted January 20, 2017 Member Contributer Share Posted January 20, 2017 3D, did not want to add any additional drive other than what you are currently working at. Just this is pretty cool. :-) Take your time but know many are watching. And thank you tremendously for sharing your adventure with us! Cheers! Dave Link to comment Share on other sites More sharing options...
Member Contributer 3dcycle Posted January 20, 2017 Author Member Contributer Share Posted January 20, 2017 I know, was just joking. been meaning on taking more pictures. Link to comment Share on other sites More sharing options...

Recommended Posts
Archived
This topic is now archived and is closed to further replies.