750 Posted August 13, 2015 Share Posted August 13, 2015 (edited) Hey all Unsure if this has been covered in detail. I thought it'd be useful to put a picture guide together for removing and rebuilding the calipers on the RC36 VFR750 (1989 to 1997). This process should be identical throughout the RC36 models as the calipers never changed (to my knowledge!) Keeping your calipers in good shape is important for obvious reasons. You want to stop the bike as effectively as possible. There are a plethora of complaints about this bikes stopping abilities. I really, truly believe the sliding calipers are more than enough for this bike as long as they're in good nick. Out of shape calipers can cause other issues, pistons seizing leads to uneven pad wear, which in turn will result in warped discs. An expensive and arsehole job you really don't want to be getting involved with, which usually leads to going to a garage and paying labour costs and over inflated prices on discs. Fresh seals, removal of rust and dirt from the slider pins and new pads will see this bike locking up a fully warmed up PR4 with absolute ease. On a side note, the other thing that affects the bikes ability to stop is the state of the front fork oil. But we'll get back to that one in another guide! Before you do this, read the WHOLE guide so you get a feel of what you need in advance. Ok so to start, you need the following: Patience 12mm Socket 8mm spanner Torque wrench (1/4" drive is best) Rags Plastic zip bags Allen keys Thick, wide flat head screw driver Brake cleaner Copper grease Red rubber grease Brake fluid (dot4)R replacement seal kit for both calipers Ok so here goes! 1. Prop the bike up. Centre stand, ABBA stand etc...just get it upright. 2. Remove the Pad retaining pin cover. *WARNING* this thing is a piece of sh*t, it can and WILL round off and be an arse to remove. I highly recommend you carefully select a fat, wide flat head screw driver tip and gently apply more pressure when trying to turn it. If you get the SLIGHTEST hint of the blade digging into the cover's metal, stop. Buy some decent penetrating fluid (WD40 fast action release is good) and douse it, leave it overnight and try again the next day. If it's truly stuck, try an impact screwdriver or just drill the bast*rd out. 3. Remove the pad retaining pin 4. Remove the pads by giving them a tug if they don't fall out 5. Remove the Caliper retaining bolts (12mm) 6. Remove the calipers 7. Place a piece of wood or something similar between the pistons and the inside of the caliper. The idea is to pump the brake lever until the calipers are MOST of the way out, so choose your piece of wood (etc) carefully. I actually used a plastic box that holds my digital measuring calipers! This will ensure the pistons move to an even point. You want them to be about this far out (see top piston, I later evened it out by pushing the top one back in, putting the plastic case in place and pumping the lever again until they were both out the same amount.... 8. Put the calipers back in place on the forks, loosely put the bolts back in to hold them there. You may need to push the slider part of the caliper out a bit to make enough space. Don't worry if the slider comes off the caliper, it just pops right back on. 9. Place a rag under/around the caliper, specifically near the brake line banjo bolt (as you'll be removing this and will want to soak up the excess fluid. It EATS paint, don't wanna ruin your wheels...right?) 10. Use a 12mm socket to crack off the banjo bolt 11. Make sure to hold the rag tactically to soak up the drips. Remove the brake line..try to leave the bolt and washers in place for ease purposes. Slide them back through the brake line etc if anything falls off. 12. Immediately slide a plastic zip bag over the brake line. This will allow you to leave it dangling while you work on the calipers. *WARNING* keep the calipers upright so the hole that the bolt went into for the brake line is facing the sky. You'll spill fluid everywhere otherwise as it sits in the caliper. Pour it into a bucket etc by turning the caliper upside down. 13. By the point the calipers will be off the bike and your hands will be all slimey, give them a wipe (your hands and the calipers!) 14. Pull the sliders off the caliper. You'll be left with the below 15. Get a rag, drop it over the pistons. Use some mole grips/strong pliers to grip the pistons over the rag and pull them out. Depending how badly seized your pistons are, you may need to use an airline in the banjo bolt hole to blast them out. Be patient and don't lose your cool, jump in the car and take them to a garage to blow 'em out if needed! Now you'll be left with two empty calipers that are still dribbling fluid, just mop it up as best you can. If you think your calipers are clean...think again, they'll likely have rust on the sliding pins and or some horrible poo looking gunk in the piston holes. My bike has 25000 miles, has been incredibly pampered it's entire life (the service history folder weight about 5kg). Look at the different between one slider and the other, look at the gunk in the piston holes and on the piston itself. I flush my fluids every 3 months (excessive I know) and it still gets like this! I've put my pistons in Paraffin so they can soak overnight to make removing the stuck on crap easier. You can get away with using super fine sandpaper to remove anything jammed on, but why ruin that nice smooth surface? Next thing is to clean the calipers up and replace the seals. 15. Clean all gunk, muck and poo from the inside of the piston holes and the surfaces of the calipers. I used a mixture of old cloths, brake cleaner and paraffin. As you can see above, my calipers were super mucky, all that brown shit was old brake fluid, that's what happens when you ride all year and leave it laid up for a while, this bike was off the road for five years before I purchased it! I went from this: To this (top caliper is the clean one, bottom caliper was done shortly after) : I had to use a very slim screwdriver with a cloth over the end to jam in the brake line hole, it had brown poo in there as well. It was so hard to shift that I ended up using one tin of brake cleaner per caliper! 16. Next remove the seals, thin ones higher up the piston hole, bigger one further down. I used the same small screwdriver to remove these. They can be a pig so have a scalpel/something sharp to hand s you can stab and drag it out if it gets stuck The muck under the seals was pretty bad too. It works it's way past the seals over the years Use the same small screwdriver or a tooth pick to scrape out as much of that crap as you can, you'll never get it all out unless you have an ultrasonic cleaning bath with some serious cleaning solution 17. Once cleaned, replace the seals with new ones or reuse yours if they're in good condition. I smother mine in red rubber grease before they go back into the slots. 18. Now replace the rubber boots. The one on the slider part is easy to pull out. Give it a clean in there with brake cleaner, rag and screwdriver if needed. Replace the boot with a new one or reuse if in good nick The caliper rubber boot is...awkward. It requires a lot of squeezing the end and tugging, It might split if in poor condition so make sure you have a replacement if needed, might be worth checking this in advance 19. Clean up your pistons and place them back into the piston holes. They can be fiddly so have a c-clamp on hand if they won't go into place. Again, I coat these in red rubber grease, it just helps the sliding action, is brake fluid friendly and keeps things from seizing for much longer 20. At this point I remove the bleed nipple and blast it with brake cleaner, both outside and jam the brake cleaner tube into the nipple hole and blast it out (watch your eyes, seriously!) I then coat this in red rubber grease and put it back in place 21. Cover the sliding pins in red rubber grease, I previously assume coper slip was fine but it seems I was wrong. Grease on the pins keeps them from rusting and assures they take an age before needing another clean (Thanks to Steve27bha for the above pic) 22. I now put the brackets back in place, they only go in one way so won't bother with a pic (forgot to take one anyway) 23, Out the slider back onto the caliper body, again these only go in one way so don't worry about what goes where 24. Brake pads now go back in place. I clean up the retaining pin with some wet and dry, feel free to coat it in copper grease to protect it from the elements 25. The brakes are now back together and ready to go on the bike, bolt them in place 26. Get a rag and wrap it around the base of the caliper, take the brake line out the plastic bag and put it back on the caliper, a washer sits at both the bolt head and under the brake line 27. Torque everything up (low range torque wrench should be in the region of £25): Mounting bolts: 27nm Banjo bolt for the brake line: 35nm Bleed nipple: 17nm 28: bleed the system, wrap a rag around the master cylinder. Use a number 2 philips screwdriver/bit and remove the lid screws. Gently prize out the plastic cover and remove the rubber reservoir fill. Turn the wheel to the left if on a stand to level out the reservoir (Careful does it, don't spill anything as brake fluid eats paint remember) Get an 8mm circle spanner, put it over the bleed nipple - either caliper is fine. Some say do the one furthest away from the caliper first but I've found it makes no difference on these calipers. It does, however, on normal 2/4/6 pot calipers with no slider in my experience Buy a one way bleed valve. Halfords sell these for £9.99 http://www.halfords.com/motoring-travel/motorcycling/motorcycle-accessories/gtmoto-brake-bleeder Stick the spaner over the bleed nipple bolt Dab red rubber grease around the nipple to stop air inducing into the system Put the thin tube of the brake bleed kit over the nipple, the valve has an arrow on it that should be pointing away from the nipple/caliper. It's one way so stops air going back up the tube. Now at this point your system will be all air and little fluid. So you WILL need to employ a traditional method of getting fluid through the lines and into the caliper (keep a bottle of dot four handy to top the reservoir up, don't let it empty of you'll induce air into the system and have to start all over again): with the bleed nipple closed, pump the lever slowly four times, hold the level all the way in open the bleed nipple with your other hand (this is why a circle spanner is handy rather than an open ended one as it stays in place) you only want to open the nipple a small amount. Still holding the Brake lever in, close the nipple Repeat the above steps until fluid starts to make it's way out the tube. It took me about 4 sets of 4 pumps. As long as everything is torqued correctly, it should be the same for you too. Once fluid comes through, you can leave the nipple open for longer but will still need to close it from time to time to pump the lever four times (and hold it) to force air out the system. This induces pressure in the system. Once the fluid comes out clear with no bubbles, move onto the other caliper. The second caliper is never as hard as most air is forced out the first caliper and fluid starts to spread evenly, Keeping a rag handy to quickly clean up spillage... Once you're happy with the pressure on the lever (should stop about half way from fully disengaged to pulling it to the handlebar) fill the reservoir up until the fluid it just above the viewing glass. Now put the rubber filler back in place, then the plastic cover then the metal lid (the writing on the metal lid should face you) Arguably you're done at this point. But roll the bike forward and press the brake. Careful not to drop your pride and joy - the bike should stop hard and the front dive a little. You may find the brakes are a bit faded at first, take it for a slow spin around the blocks and progressively press the lever harder and harder until the bite feels great. If it simply won't bite hard you can check the following: Pads for grease.dirt - clean with brake cleaner System for air - bleed again until satisfied Worst case scenario you may have a master cylinder that needs a rebuild, having a seized piston can mask this and make the brakes feel super tight and strong. Cleaning them up and freeing the pistons up to move evenly can show your system to be a bit spongey as everything moves back to positions as it should, rather than one piston staying 3/4 the way out while one backs off - or the slider being stuck as a certain point. Hope this makes sense. I'm going to re-read this a couple of times and make alterations as I see fit. Hopefully it'll help those who're too scared to try this on their own. It's very easy as long as you're methodical about it. Edited August 16, 2015 by johnlondon 3 Quote Link to comment Share on other sites More sharing options...
Member Contributer Lorne Posted August 13, 2015 Member Contributer Share Posted August 13, 2015 Well done, I love seeing tutorials like this. Looking forward to the next instalment. Quote Link to comment Share on other sites More sharing options...
Member Contributer KevCarver Posted August 13, 2015 Member Contributer Share Posted August 13, 2015 Wow, those were overdue! Some newer bikes have a rubber plug to cover the pad pin instead of the slotted, threaded cover. Pretty sure my ST1300 does. Maybe go ahead and order a pair to have on hand. They are really only there to keep brake dust and gunk out of the hole so the pin comes out. Quote Link to comment Share on other sites More sharing options...
750 Posted August 13, 2015 Author Share Posted August 13, 2015 Good point, my SV650 had rubber plugs so I'll mention this in the guide. I think the hole is about 8mm across but I'll measure it for definite tomorrow :) The brakes actually work relatively well on this, but the left caliper was in worse state than the other so the braking wasn't as effective as it can be. My tatty VFR750 (I have two!) has insanely bitey brakes in comparison. So this should see them evening the playing field a little! This bike also has a Maxton front end, so I'm excited to see the results! Quote Link to comment Share on other sites More sharing options...
Member Contributer Dutchy Posted August 13, 2015 Member Contributer Share Posted August 13, 2015 Tip: Replace the oem pin covers with these from Pro-Bolt.... 3 Quote Link to comment Share on other sites More sharing options...
750 Posted August 13, 2015 Author Share Posted August 13, 2015 Aye, or those! Look pro-bolt-expensive though haha. It's also send me down the long expensive route of powder coating the rest of the calipers to make them look as good as those little shiny bits Quote Link to comment Share on other sites More sharing options...
LookingHard Posted August 14, 2015 Share Posted August 14, 2015 johnlondon, As I looked through your post I thought it was interesting that you soaked the pistons overnight in 'Parrafin', until I looked it up and realized on this side of the pond it is 'Kerosene'. Thanks, LookingHard 1 Quote Link to comment Share on other sites More sharing options...
Member Contributer Dutchy Posted August 14, 2015 Member Contributer Share Posted August 14, 2015 Across the North Sea: "petroleum" :-) Quote Link to comment Share on other sites More sharing options...
750 Posted August 14, 2015 Author Share Posted August 14, 2015 As it's hammering it down (must be a few inches in the past hour alone!) I'll be finishing this off tomorrow Quote Link to comment Share on other sites More sharing options...
750 Posted August 15, 2015 Author Share Posted August 15, 2015 Guide updated, hope it helps a few in need! Quote Link to comment Share on other sites More sharing options...
steve27bha Posted August 15, 2015 Share Posted August 15, 2015 I suggest your step 21 is wrong. Copper grease and most other greases make rubber expand and the sliding pins operate inside a rubber tube (the boots replaced in step 18). Expansion of the rubber will jam the sliding action and reduce the caliper's effectiveness. Use red rubber grease on the sliding pins instead. This was my 750FR. I never replaced the boots in five years and 40,000 miles of Scottish weather, commuting 10 months of the year. Quote Link to comment Share on other sites More sharing options...
750 Posted August 16, 2015 Author Share Posted August 16, 2015 Fair play, didn't know that at all. Will amend it, thanks! 1 Quote Link to comment Share on other sites More sharing options...
keny Posted September 10, 2015 Share Posted September 10, 2015 Nice guide, and will come to practice on my 3rd gen next winter I think Quote Link to comment Share on other sites More sharing options...
jshbrwr Posted January 13, 2016 Share Posted January 13, 2016 Wonderful guide! I referred to it multiple times yesterday while dealing with a seized piston. First time doing brake work (ever) and I was a bit anxious about it. Question - what is red rubber grease? Never heard of it. Also, I have one piston of one caliper out but am having a tough time with the other. Any tips? I thought of using air but with the other piston out, it would just escape that way. Can I go ahead and replace seals in the first one and then reassemble and use the brake lever and fluid to force the stuck one out? I know that's a lot of work but I don't want to take it to anyone. $99/hr Quote Link to comment Share on other sites More sharing options...
steve27bha Posted January 23, 2016 Share Posted January 23, 2016 Question - what is red rubber grease? Never heard of it. Also, I have one piston of one caliper out but am having a tough time with the other. Any tips?... Answer:- http://www.ebay.co.uk/itm/like/391143722465?adgroupid=13585920426&hlpht=true&hlpv=2&rlsatarget=pla-131843269746&adtype=pla&ff3=1&lpid=122&poi=&ul_noapp=true&limghlpsr=true&googleloc=1007330&device=c&chn=ps&campaignid=207297426&crdt=0&ff12=67&ff11=ICEP3.0.0-L&ff14=122&viphx=1&ops=true&ff13=80 That's in the UK. I'm sure there will be a US version. There is a specific tool that is like a reverse pair of pliers - it fits inside the recess of a piston and expands to grip the inside. Twist the piston back and forth to remove it. Alternatively use a good pair of pliers (with wide smooth jaw tips, not narrow pump pliers) to grip the very edge of the piston - one jaw inside, one outside - and twist. Dress any damage before reinsertion. Quote Link to comment Share on other sites More sharing options...
Member Contributer Dutchy Posted January 24, 2016 Member Contributer Share Posted January 24, 2016 Quote Link to comment Share on other sites More sharing options...
Member Contributer mello dude Posted January 25, 2016 Member Contributer Share Posted January 25, 2016 Nice job John. Another alternative to get the pistons out is to hang the caliper over a bucket with one pad on the outside such that the pistons will move near completely out. I have a spare M/C on a clip on I use and fill with fluid plus spare hose,and then pump the pistons as far as they will go without falling out. From there its just a matter of pulling them out by hand. The bucket of course catches the fluid when you finally get them out. Quote Link to comment Share on other sites More sharing options...
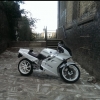
jshbrwr Posted January 26, 2016 Share Posted January 26, 2016 (edited) Thanks all for the tip. I ended up just replacing the good piston seals and piston, hooked it back up to the brake line and put a block between the good piston and pumped the handle till the old one came out. It was pretty scratched up from my prior attempts with the pliers so I bought a replacement piston. Here it is just after removing the caliper Then finally out! You can see the gnarled piston in the background Left caliper before: Left caliper after: Funny, the left one went so quickly and I didn't really have to reference the guide or the manual. Just did it . Bleeding the brakes didn't work so well the first time, so I did it again, and things were cool. Thanks for all the tips and this guide, John. I can now say I've done brake work! Very satisfying to do it myself. Saved too! Here's the ride before I took it out with new brakes: Again, thanks all!! Edited January 26, 2016 by jshbrwr Quote Link to comment Share on other sites More sharing options...
squirrelman Posted January 26, 2016 Share Posted January 26, 2016 (edited) Well done John ! May i add supplementary info to your thread that's relevant to gen 1 and 2 VFRs ?: http://vfrworld.com/forums/forumdisplay.php/14-1st-amp-2nd-Generation-1983-1989 Edited January 26, 2016 by squirrelman Quote Link to comment Share on other sites More sharing options...
Member Contributer MadScientist Posted January 27, 2016 Member Contributer Share Posted January 27, 2016 Wow you really have patience and/or a really dirty camera. I did this on the 5g and thought about making a guide, but I have trouble being bothered to stop and take pictures. Not to mention figuring out what things might be important to have pictures of. My guide would read something like: Take everything the fook apart. Throw out nearly everything made of rubber. Order everything that is worn out. Get busy with other projects and store it all for 6 months. Put partially back together. Discover parts are missing. Order more parts. Find missing parts. Curse. Reassemble. 1 Quote Link to comment Share on other sites More sharing options...
Member Contributer JZH Posted January 28, 2016 Member Contributer Share Posted January 28, 2016 There is a specific tool that is like a reverse pair of pliers - it fits inside the recess of a piston and expands to grip the inside. Twist the piston back and forth to remove it. Alternatively use a good pair of pliers (with wide smooth jaw tips, not narrow pump pliers) to grip the very edge of the piston - one jaw inside, one outside - and twist. Dress any damage before reinsertion. What?!?! There's a motorbike-related tool I do not own? Tell me more! Ciao, 1 Quote Link to comment Share on other sites More sharing options...
Member Contributer MadScientist Posted January 28, 2016 Member Contributer Share Posted January 28, 2016 Not necessarily motorbike related but depending on the size I've used battery terminal spreaders, external snap ring pliers, and chain pliers Quote Link to comment Share on other sites More sharing options...
TheStig Posted September 3, 2016 Share Posted September 3, 2016 Good stuff.Here's 2 additional good tips:(1). Jam the brake lever fully depressed / pulled. As it closes the path for fresh fluid to pass through the master cylinder this stops all the brake fluid leaking out of the reservoir and means you can easily bleed fresh fluid into the line before re-fitting the banjo bolt. Much easier & less time consuming than letting all the fluid out and starting from a system full of air. (2). Use a fine brass brush on the end of a dremmel to clean the recesses where seals are located. It'll take off any gunk without scratching the surface. Much easier & better results than trying to scratch the dried up crap out with a toothpick, etc. Quote Link to comment Share on other sites More sharing options...
SEdwards Posted December 30, 2020 Share Posted December 30, 2020 Many thanks for your excellent guide. I had one very stuck piston on my Gen 4. In step 7 you indicate how to even up and ease out the pistons using the brake lever. I had to get them much farther out in order to remove them without damaging them. I made use of the 8mm spanner that I was using for the bleed nipple. It’s much thinner than my micrometer box. Given the pressure I had to apply to shift the stuck piston, I suspect the good piston would have crushed anything plastic that I could have stuck in there. After some experimentation I discovered that laying the spanner shaft flat across the calliper opening and pumping the handle pushed the free piston almost all the way out. Then it jammed on the spanner but still retained pressure. Maybe it was only sat on the dust seal, but it worked. Keep pumping the handle hard and the second piston will eventually move to the same point. Now with them both being stuck so far out I could slide out the spanner and the pistons could then be wiggled from side to side and easily pulled free. That tip from TheStig about the closed brake lever is working nicely to avoid the system draining down. Quote Link to comment Share on other sites More sharing options...

Recommended Posts
Join the conversation
You can post now and register later. If you have an account, sign in now to post with your account.