Member Contributer JZH Posted March 1, 2015 Member Contributer Share Posted March 1, 2015 This week's progress: Only real issue is the clearance of the Superhawk front fender. I will have to do more research to see how other guys shimmed it to fit on the SH forks. Did you use 5th gen triples or the SH triples? 5th Gen triples. Wondering if I need a set of SH triples? That would solve one problem, but present another: The 5th-gen wheel and discs are designed to fit between forks spaced 204mm apart. The VTR1000F (SuperHawk) and 3rd-4th-gen VFR750F forks are spaced 192mm apart. So you would have to use a narrower wheel and discs if you switched to VTR triples. For that reason, you're probably better off just fitting a different mudguard or fabricating some spacers to allow the used of the one you have. FYI, other Hondas with 204mm fork spacing (and conventional forks) include: CBR600FX-4i, CBR600RR3-4, VFR800FiW-VTEC, CBR900RRN-V, CBR1100XXV-7. I'm sure there are others, but that should get you started... Ciao, Link to comment Share on other sites More sharing options...
Member Contributer deltaboxii Posted March 1, 2015 Author Member Contributer Share Posted March 1, 2015 Thanks for the info. If I had done my homework more I would have seen that Mellow Dude and others that have done the conversion simply used the stock fender with some homemade fabricated brackets. Looks like I wasted my money on the SH fender, glad I bought a cheap one off of fleabay. This week's progress: Only real issue is the clearance of the Superhawk front fender. I will have to do more research to see how other guys shimmed it to fit on the SH forks. Did you use 5th gen triples or the SH triples? 5th Gen triples. Wondering if I need a set of SH triples? That would solve one problem, but present another: The 5th-gen wheel and discs are designed to fit between forks spaced 204mm apart. The VTR1000F (SuperHawk) and 3rd-4th-gen VFR750F forks are spaced 192mm apart. So you would have to use a narrower wheel and discs if you switched to VTR triples. For that reason, you're probably better off just fitting a different mudguard or fabricating some spacers to allow the used of the one you have. FYI, other Hondas with 204mm fork spacing (and conventional forks) include: CBR600FX-4i, CBR600RR3-4, VFR800FiW-VTEC, CBR900RRN-V, CBR1100XXV-7. I'm sure there are others, but that should get you started... Ciao, So you think that a 6th Gen fender would work? I would prefer to use the 6th gen front fender as its a bit more modern looking. Link to comment Share on other sites More sharing options...
Member Contributer mello dude Posted March 1, 2015 Member Contributer Share Posted March 1, 2015 This week's progress: Only real issue is the clearance of the Superhawk front fender. I will have to do more research to see how other guys shimmed it to fit on the SH forks. Did you use 5th gen triples or the SH triples? 5th Gen triples. Wondering if I need a set of SH triples? No, keep the 5th gen triples, if you use a 5th gen fender, I have backets for a direct bolt up. Check my gallery. Link to comment Share on other sites More sharing options...
Member Contributer deltaboxii Posted March 2, 2015 Author Member Contributer Share Posted March 2, 2015 Much appreciated MD. I am surprised the 6th gen fender doesn't work, but you are the expert! The fender brackets will come in handy for sure. Link to comment Share on other sites More sharing options...
Member Contributer JZH Posted March 2, 2015 Member Contributer Share Posted March 2, 2015 The VTEC forks have larger tubes, but the lowers may be the same OD--I don't know. But you still have to deal with potentially different locations for the mounting bolts/brackets. Go with MD's brackets, as that is a proven solution. Ciao, Link to comment Share on other sites More sharing options...
Member Contributer deltaboxii Posted March 13, 2015 Author Member Contributer Share Posted March 13, 2015 This week's update- A huge THANKS to Mike Mellow Dude for solving my front fender issue with the last of his front fender brackets. Beautiful workmanship. Thanks Mike!!!!!!!!!!!! The Braking front wave rotors are also installed. Two new issues- 1) there is a small gap between the tank and the front of the seat. I was planning to have Saddlemen customize a seat for me, and I am hoping that they can add some additional material here to close the gap. 2) The left side between the seat and subframe exposes the battery. the other side looks fine with just the rear master cylinder reservoir. But the left side looks like crap and I would not want my battery sitting out in the open like that. So I will have to get creative with a cover since the stock Gen 6 battery cover most likely will not work. Since the subframe is steel, I should be able to get a tab welded on that would allow a push pin release. Link to comment Share on other sites More sharing options...
Veefer800Canuck Posted March 14, 2015 Share Posted March 14, 2015 Assembly issues? No problem. It looks like you can just ride one of your other bikes. ;-) Link to comment Share on other sites More sharing options...
Member Contributer deltaboxii Posted March 14, 2015 Author Member Contributer Share Posted March 14, 2015 Those are unfortunately / fortunately not all mine... Depending on which way you look at it. Link to comment Share on other sites More sharing options...
Member Contributer deltaboxii Posted April 7, 2015 Author Member Contributer Share Posted April 7, 2015 This week's progress: - Stainless steel lines installed - Brakes are now "delinked" -CBR 929 braking master cylinder installed -Braking (brand) Clutch master cylinder installed - RC51 rear master cylinder installed I can't wait to try the brakes on this VFR! Next Up: - Install GSXR turn signal mirrors -Seat to Saddlemen for custom foam/ cover - Replace all radiator hoses -Bodywork off to the painter. We are going to fill in the turn signal holes (De-dumbo) and add some bodywork to the headlight area to give the impression of dual headlights vs. the stocker's big single headlight. My painter is itching to do some Plastic welding. see pic, please forgive my horrible photoshop skills Link to comment Share on other sites More sharing options...
Member Contributer KevCarver Posted April 7, 2015 Member Contributer Share Posted April 7, 2015 -Bodywork off to the painter. We are going to add some bodywork to the headlight area to give the impression of dual headlights vs. the stocker's big single headlight. My painter is itching to do some Plastic welding. see pic, please forgive my horrible photoshop skills Oh, that will be an interesting new twist! Link to comment Share on other sites More sharing options...
Member Contributer deltaboxii Posted April 30, 2015 Author Member Contributer Share Posted April 30, 2015 Latest update w gsxr Turn signal mirrors. Counting thr days down until it goes off to the painter. Link to comment Share on other sites More sharing options...
Member Contributer deltaboxii Posted May 2, 2015 Author Member Contributer Share Posted May 2, 2015 Paint scheme plan. Silver base. Gunmetal wing w red outline. Link to comment Share on other sites More sharing options...
Member Contributer deltaboxii Posted June 9, 2015 Author Member Contributer Share Posted June 9, 2015 My seat arrived today. I sent it off to Saddlemen back in March to be recovered and install the "touring foam". They also added a channel similar to what you would find on a bicycle seat to relive pressure. They call this "Gel Channel". It sure does look cool, especially with the suade. They did a wonderful job, were quick with their turnaround and very fair with their pricing. All of this for around the price of a new Corbin or Sargent seat. They were also kind enough to add some additional foam to the front of the seat to eliminate the gap between the new 6th gen tank and the subframe. I am headed to the shop tomorrow to see how it looks on the bike and check the fit. A few other members have gone the Saddlemen route and are reporting that their seats are extremely comfortable even on all day rides. Time will tell but I don't see any reason to doubt them. As far as custom work goes, they really can do just about anything that you want. Custom embroidery, stitching, colors, heights, even add a heater. I worked with Anne there and she and Tom were super friendly and extremely knowledgeable. http://www.saddlemen.com/ Saddlemen Gel Channel Custom ProgramWant a personalized seat? Check Saddlemen's Sportbike or Adventure TRACK listings, find the seat application for your motorcycle, select the cover material and thread color and call us with your needs. We'll build your seat just the way you want it - and if you want it even more custom, we can do that too! Potential buyers with concerns about comfort, seating position and styling can contact our knowledgeable sales staff at our California offices and factory. A brief conversation can answer many questions, and provide a basis for creating a seat for the best ride possible. We can also discuss all of the available options for cover materials, stitching and ornamentation.To order or for consultation, our experienced Sales Department representatives can be reached from 8:00 AM until 4:00 PM Pacific time Monday to Friday at (800) 397-7709. Thanks Saddlemen! Link to comment Share on other sites More sharing options...
marriedman Posted June 9, 2015 Share Posted June 9, 2015 I saw that channel design on a 7th gen last year and I am convinced that is what mine needs. I would be very interested in your review of it! Link to comment Share on other sites More sharing options...
Member Contributer Switchblade Posted June 9, 2015 Member Contributer Share Posted June 9, 2015 My seat arrived today. I sent it off to Saddlemen back in March to be recovered and install the "touring foam". They also added a channel similar to what you would find on a bicycle seat to relive pressure. They call this "Gel Channel". It sure does look cool, especially with the suade. They did a wonderful job, were quick with their turnaround and very fair with their pricing. All of this for around the price of a new Corbin or Sargent seat. They were also kind enough to add some additional foam to the front of the seat to eliminate the gap between the new 6th gen tank and the subframe. I am headed to the shop tomorrow to see how it looks on the bike and check the fit. A few other members have gone the Saddlemen route and are reporting that their seats are extremely comfortable even on all day rides. Time will tell but I don't see any reason to doubt them. As far as custom work goes, they really can do just about anything that you want. Custom embroidery, stitching, colors, heights, even add a heater. I worked with Anne there and she and Tom were super friendly and extremely knowledgeable. http://www.saddlemen.com/ Saddlemen Gel Channel Custom ProgramWant a personalized seat? Check Saddlemen's Sportbike or Adventure TRACK listings, find the seat application for your motorcycle, select the cover material and thread color and call us with your needs. We'll build your seat just the way you want it - and if you want it even more custom, we can do that too! Potential buyers with concerns about comfort, seating position and styling can contact our knowledgeable sales staff at our California offices and factory. A brief conversation can answer many questions, and provide a basis for creating a seat for the best ride possible. We can also discuss all of the available options for cover materials, stitching and ornamentation. To order or for consultation, our experienced Sales Department representatives can be reached from 8:00 AM until 4:00 PM Pacific time Monday to Friday at (800) 397-7709. Thanks Saddlemen! Nice seat , let us know how it rides Roll On ... . Link to comment Share on other sites More sharing options...
Member Contributer deltaboxii Posted June 12, 2015 Author Member Contributer Share Posted June 12, 2015 The bodywork is at the painter now. The painter was super pumped to use his new plastic welder. We have added some plastic in between the headlights to give the bike a more aggressive, modern look. It's also kind of my homage to the 90-93 and '94-'97 VFRs that had the same "dual headlight" trick. Which was really a single headlight under the split headlight openings. The 1990 VFR was my introduction to the VFR madness, lusting after a red one with gold wheels every day when I worked at Midlothian Honda. And the first VFR that I ever had the chance to ride (and have been hooked on since) was a 4th gen. So I thought it would be cool to flash back to those older models. We also used the Thurn covers to glass over the turn signal openings. It helped make the process easier, although it could have been done without them. But I already had them so... Turn signal de-dumbo-ing complete. Link to comment Share on other sites More sharing options...
Member Contributer ggathagan Posted June 13, 2015 Member Contributer Share Posted June 13, 2015 They call this "Gel Channel". It sure does look cool, especially with the suade. I'd call it the flatulence channel.... Link to comment Share on other sites More sharing options...
Member Contributer deltaboxii Posted June 13, 2015 Author Member Contributer Share Posted June 13, 2015 Extra horsepower??? Link to comment Share on other sites More sharing options...
Member Contributer deltaboxii Posted June 25, 2015 Author Member Contributer Share Posted June 25, 2015 Meanwhile...At the painter Link to comment Share on other sites More sharing options...
The Phantom Posted June 26, 2015 Share Posted June 26, 2015 I like the headlight aperture mod, looking forward to seeing the bike in paint. Link to comment Share on other sites More sharing options...
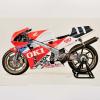
Member Contributer deltaboxii Posted June 29, 2015 Author Member Contributer Share Posted June 29, 2015 The decals arrived today. Special thanks to VFRD forum member DALLASB (Dallas) for his assistance in creating these awesome custom decals. Shameless plug- if you are interested in any of these decals Dallas can be reached at dallasbrandt@gmail.com Creating decals isn't his only job he just does this as a hobby and enjoys helping fellow VFRD members. Thanks Dallas!!! Link to comment Share on other sites More sharing options...
RazorWing Posted July 29, 2015 Share Posted July 29, 2015 So any new pictures yet? I'm thinking of doing this to mine! What did the parts needed cost you? I've not seen any of those come up here and eBay is all over the place with questionable quality. Sent from my iPhone using Tapatalk Link to comment Share on other sites More sharing options...
Member Contributer deltaboxii Posted July 29, 2015 Author Member Contributer Share Posted July 29, 2015 Hey RW, Here is the most recent facebook post from TT Deisgnz. Looks like we should be reassembling the bodywork soon. Which parts are you specifically interested in for pricing? I kept a pretty detailed spreadsheet of the costs involved in the project, it would shock you how much it cost even with buying many of the parts off of eBay. I have been fortunate enough to have a good mechanic helping me with the project that isn't putting me over a barrel for labor costs and knows what he is doing. Even with that, the cost of the project will probably scare you off! thanks for your interest! Erik Link to comment Share on other sites More sharing options...
RazorWing Posted July 29, 2015 Share Posted July 29, 2015 Hey RW, Here is the most recent facebook post from TT Deisgnz. Looks like we should be reassembling the bodywork soon. Which parts are you specifically interested in for pricing? I kept a pretty detailed spreadsheet of the costs involved in the project, it would shock you how much it cost even with buying many of the parts off of eBay. I have been fortunate enough to have a good mechanic helping me with the project that isn't putting me over a barrel for labor costs and knows what he is doing. Even with that, the cost of the project will probably scare you off! thanks for your interest! Erik The 6th gem tail conversion. It looks like subframe, fairing, seat, wiring, tail light, and exhaust is the key parts needed, right? With tank being a "it can work" kind of part. Is that right? I've done some conversions and a lot of mechanical work in the past, just very little motorcycle experience. Sent from my iPhone using Tapatalk Link to comment Share on other sites More sharing options...
Member Contributer deltaboxii Posted July 29, 2015 Author Member Contributer Share Posted July 29, 2015 In short, you will need: 6th gen: subframe and battery tray Rear fender not required but helpful Seat (needs to be modified slightly to be "right"- Saddlemen did that for me) tail light exhaust rear cowling/ seat cowl passenger grab rails or cowl inserts if you don't want the grab rails on Fuel tank if you want the subframe/ seat/ tank to line up right (then you will need another pump possibly) Move the seat latch Move the master cylinder for the rear brake Move the Regulator /rectifier and other wiring Passenger pegs (if you want those also) 6th gen bags- to me it seems like that was half the point of doing this, to fit the factory Givi OEM luggage to a 5th gen rather than Givi aftermarket or soft bags I used some parts off of ebay, some off of Craigslist and some new. I got lucky with the Staintune 6th gen and found one in great shape used on CL for only $400. My rough guess on the cost of everything, minus the labor would put it at around $2000 including repainting the tank, bags and rear cowling to match. That's also with the exhaust, a (used) tank, (used) Honda OEM bags and mounts, a Thurn clear LED tail light (the HOnda ones aren't cheap either), a used subframe, passenger pegs, and rear cowling and battery tray off of flea-bay. Yep, not cheap even if you are bargain hunting. Here's a detailed list of everything that I did for modifications. Basically I wanted to build the 5th Gen that Honda should have upgraded the VFR to as a successor to the 5th gen, with OEM luggage capability, more modern suspension, bodywork, brakes, and underseat exhaust. Repaint Bags and passenger pegs Staintune exhaust 99 Header pipes PSR footpegs black Decals Clear Tank pad 90 degree valve stems Metzeler M7RR tires Grips Superhawk front forks Front fender mounts CBR 929 shock LED headlight kit Updated Regulator PAIR block off valve 8 Spoke rear wheel 6th gen tail section/ seat cowl/ plates 6th gen clear tail light 6th gen subframe and battery tray Honda VFR trim panels 6th gen fuel tank Power Commander 3 Saddlemen seat Digital Gear indicator Spark Plugs NGK Throttlemeister Factory Shift Kit K&N Air filter Voltmeter New battery Stainless brake / Clutch lines CBR 929 radial master cylinder GSXR 1000 brake pads 2001 2002 Braking clutch master cylinder Braking Rotors 32-6105L/ 32-6105R VFR ness Honda radiator hoses new screen Thurn turn signal block off kit Powdercoat wheels/ pegs/ bar ends/ pipe GSXR mirrors Sebspeed clear cover gsxr 6 piston brakes 2001 2002 chain sprockets/ regear Link to comment Share on other sites More sharing options...

Recommended Posts
Archived
This topic is now archived and is closed to further replies.