93 VFR750 RC36 Posted November 6, 2009 Share Posted November 6, 2009 Has anyone here installed one of the left or right exit exhausts sold by Sandy Bike Spares in the UK? Comments or points? Stew Link to comment Share on other sites More sharing options...
Member Contributer Jmmymc750 Posted December 9, 2009 Member Contributer Share Posted December 9, 2009 Has anyone here installed one of the left or right exit exhausts sold by Sandy Bike Spares in the UK? Comments or points? Stew Stew, I don't know exhaust flow, I mostly know blood flow, but even with steam flow (I am working on a PhD in Biomedical Engineering, and am former mechanical operator for naval nuclear ships) piping directional changes should be smooth bends to limit laminar flow disturbance. Disturbance causes back pressure, and while some is necessary, I don't like the angled directional changes of the sandy spares set. I have not tried them, but I'm not gonna, just due to that...FWIW Link to comment Share on other sites More sharing options...
Member Contributer TommyHoffman Posted December 9, 2009 Member Contributer Share Posted December 9, 2009 Has anyone here installed one of the left or right exit exhausts sold by Sandy Bike Spares in the UK? Comments or points? Stew Stew, I don't know exhaust flow, I mostly know blood flow, but even with steam flow (I am working on a PhD in Biomedical Engineering, and am former mechanical operator for naval nuclear ships) piping directional changes should be smooth bends to limit laminar flow disturbance. Disturbance causes back pressure, and while some is necessary, I don't like the angled directional changes of the sandy spares set. I have not tried them, but I'm not gonna, just due to that...FWIW Thanks for the tip, I wonder if they ship to the US? As for the flow, I learned that theory a long time ago. Not saying it is wrong, but I do not see any thing in this design that does nor occur in the stock exhaust. The nature of the design in the V-4. I was talking to an exhaust expert once, about your exact concern. The most important angle is the one coming out of the head. Then went off about volume of the pipe, expansion rates, back pressure etc. So everything you say is accurate it leaves off the fact that packaging the exhaust to fit that rule, would be a challange even Honda did not pursue. Link to comment Share on other sites More sharing options...
Guest Posted December 9, 2009 Share Posted December 9, 2009 What do these things look like? Anyone have a linky? Link to comment Share on other sites More sharing options...
mrmatt Posted December 9, 2009 Share Posted December 9, 2009 I was thinking about installing one of these, I believe they do ship to the US, but I was able to find a used TBR system first for much cheaper Looking at the junction that's been mentioned I would tend to think that the back pressure from the exhaust would be the dominating factor in the system. Link to comment Share on other sites More sharing options...
Member Contributer Jmmymc750 Posted December 9, 2009 Member Contributer Share Posted December 9, 2009 Has anyone here installed one of the left or right exit exhausts sold by Sandy Bike Spares in the UK? Comments or points? Stew Stew, I don't know exhaust flow, I mostly know blood flow, but even with steam flow (I am working on a PhD in Biomedical Engineering, and am former mechanical operator for naval nuclear ships) piping directional changes should be smooth bends to limit laminar flow disturbance. Disturbance causes back pressure, and while some is necessary, I don't like the angled directional changes of the sandy spares set. I have not tried them, but I'm not gonna, just due to that...FWIW Thanks for the tip, I wonder if they ship to the US? As for the flow, I learned that theory a long time ago. Not saying it is wrong, but I do not see any thing in this design that does nor occur in the stock exhaust. The nature of the design in the V-4. I was talking to an exhaust expert once, about your exact concern. The most important angle is the one coming out of the head. Then went off about volume of the pipe, expansion rates, back pressure etc. So everything you say is accurate it leaves off the fact that packaging the exhaust to fit that rule, would be a challange even Honda did not pursue. well, sure, a lifetime challenge...but Honda's bends are mostly pretty/smooth. I saw a picture here on VFRD that reminded me of an aorta, and I cant stop thinking about toroidal pipes, and if anybody makes them/how to make them...while trying to absorb a 2 hour lecture on nanoparticles and medicine. Not good for the nanomedicine info... The joint and the squared off bends are just not the norm...and fluid flow seems to like fluid bends...so I will look for TBR for my 90 (which has the Kerker left exit), and if I get the 98 I am looking at, I am thinking Delkevic down pipes, and a buddy that welds - flip! the exit! Just a thought...not very expensive. Link to comment Share on other sites More sharing options...
NateRC36 Posted December 9, 2009 Share Posted December 9, 2009 They're good quality, I brought a standard exit set of headers for my 94 RC36 and they fit well, no leaks, and improved engine running (but that was mostly due to the pin holes in my last exhaust. 24,000 miles later and no complaints, finish has held up against crap British weather (just slight spotting on headers and the odd stone chip). There's probably higher quality kit out there but as a direct oem-like replacement these are definitely the best value. Cheers Nate :fing02: Link to comment Share on other sites More sharing options...
93 VFR750 RC36 Posted June 21, 2010 Author Share Posted June 21, 2010 After a bit of a pregnant pause, I have just ordered a Sandy Bike Spares left-exit exhaust for the VFR750 (RC36). I'll take some photos before, during and after installation and give you my thoughts/advice. Stew Link to comment Share on other sites More sharing options...
93 VFR750 RC36 Posted July 1, 2010 Author Share Posted July 1, 2010 After a short faf where I got the wrong exhaust, I have my new exhaust from SBS (Sandy Bike Spares). My initial impression is that: 1. Exterior presentation is nice with visible welds being nicely done. 2. Internal join of downpipes leaves something to be desired. Can anyone say flow restriction? I think I can grind out the restrictions with only one pipe cut and re-weld but this is the main problem with the system as far as I can tell at the moment. 3. Viper can seems much nicer than I expected (we'll see how it sounds). Comparing the system to the SBS right exit system, this system is much better. There are no odd bends and/or dents in the system (unlike the collector section on the RH exit system) and once I've addressed the poor cut and match at the front/rear pipe joins, it should flow reasonably well. It's no TBR system but for £320.00 it's not too bad. I intend to query SBS about the internal pipe joins as it seems insane that a reasonable job in bending, fitting and welding has been compromised by two very odd joins. A simple jig and hole cutter would solve the problem in an instant and shouldn't be beyond the capability of the Chinese workshop that produced the rest of the system. I'll get it cleaned up and then get some photos once I've fitted it (panels off). Once the bike is back on the road I'm going to get it rolling road tuned at GP Performance down the road so I'll be able to make a proper recommendation after that. I'm only looking for stock-ish performance out of this cheap exhaust (1/2 the price of Motad) and if it gives that, I'll be happy. Just a couple of Sandy's photos to finish this post (whet the appetite?). The red RC36 and blue RC36a show the fitted exhaust quite well. I'll add bright yellow to the mix when mine's done. Link to comment Share on other sites More sharing options...
mrmatt Posted July 1, 2010 Share Posted July 1, 2010 Great, thanks for the update Link to comment Share on other sites More sharing options...
SEBSPEED Posted July 1, 2010 Share Posted July 1, 2010 Wow, that joint is horrible! :blink: :fing02: :blink: Link to comment Share on other sites More sharing options...
Member Contributer InterFester Posted July 3, 2010 Member Contributer Share Posted July 3, 2010 That "merge" ,if you want to call it that, is strictly cosmetic. The 2-1 header on my lawnmower engine is much better than that. They should be ashamed of themselves, very ashamed. Link to comment Share on other sites More sharing options...
Member Contributer Jmmymc750 Posted July 3, 2010 Member Contributer Share Posted July 3, 2010 They look pretty! I held out and thanks to a "heads up" from someone posting up on here, and got the TBR system. They are light! Not as pretty as yours, but the bends are poetic. Did I mention they are light? The whole package from UPS was listed at 9 pounds! Good luck with those! Can't wait to hear! Cheers! Link to comment Share on other sites More sharing options...
93 VFR750 RC36 Posted July 4, 2010 Author Share Posted July 4, 2010 I would have loved a TBR system but I can't ride until I put my bike back together and it needs an exhaust. As TBR haven't made a LH exhaust for a RC36 for some time, I was a bit stuck. I'm now sorting out the joins on this exhaust. Fortunately I can weld and have yet to find anything I couldn't fix. Link to comment Share on other sites More sharing options...
93 VFR750 RC36 Posted July 5, 2010 Author Share Posted July 5, 2010 Step 1 - cut exhaust near to join - done Stew 2 - grind out restrictions and blend joint radiuses - done Pictures to follow. Next I'll re-weld the collector together and fit the system. Carb re-build to do and then it'll be off to the chassis dyno for a couple of pulls to see how it runs. If it's close to stock I'll ride it until winter and then cut/rebuild the collector with proper joins. We'll see. Just enjoying the project now. Haven't welded stainless for a while, it's kinda fun. Need some better gas for this job so that'll take a couple of days. Link to comment Share on other sites More sharing options...
Veefer800Canuck Posted July 5, 2010 Share Posted July 5, 2010 Oh yeah, you don't have to be a MotoGP crewchief to see those pipe joins are a problem! :fing02: Link to comment Share on other sites More sharing options...
93 VFR750 RC36 Posted July 6, 2010 Author Share Posted July 6, 2010 Veefer800, No, a deaf/blind/mute would cry "Aaaaaaah!" when encountering those joins so a decent Crew Chief would probably just hit someone with something heavy for even showing him the kit. Having measured up the little hole in the intercected pipe, I have found that 55% of the join cross sectional area was blocked. This is in addition to the awful flow charactoristics of pushing exhaust gasses through a sharp edged hole. I didn't particularly enjoy fluid dynamics at Uni but I can give a general great / ok / bloody hell assessment. Anyway, I've managed to clear both restrictions and radius the welded joins as much as possible. It's still not as good as a proper double angle blended join but that'll come later if it's performing worse than stock. The internal diameter of the primaries is about 2mm larger than stock and, apart from the two joins, the pipes are nicely bent and have no dents. With significantly fewer bends and pinches than the stock exhaust, and being void of that bloody huge collector, I'd be surprised if it doesn't flow as well as stock (within a % or two). Anyway, I just noticed you're in Whitecourt. This bike is going back to Alberta with me when I move back home so we'll have to meet up for a mountain ride or something. Link to comment Share on other sites More sharing options...
Member Contributer Jmmymc750 Posted July 6, 2010 Member Contributer Share Posted July 6, 2010 Nice work, from the sound of it! I wish I could weld. I can fix things. Pretty well, despite I have not been a paid wrench turner in years. But no welding! And not much time to turn wrenches lately... "Uni" as you call it, is taking up all my time! I don't even get to ride much! Link to comment Share on other sites More sharing options...
Veefer800Canuck Posted July 6, 2010 Share Posted July 6, 2010 Anyway, I just noticed you're in Whitecourt. This bike is going back to Alberta with me when I move back home so we'll have to meet up for a mountain ride or something. Wow, moving back to the land of Cows and Oil? :dry: Let me know when that happens. :goofy: Link to comment Share on other sites More sharing options...
93 VFR750 RC36 Posted July 14, 2010 Author Share Posted July 14, 2010 Veefer800, It's the cows I am coming back to, well, bison really. Dad's getting ready to semi-retire (ranchers never really retire, just slow down) and I've been getting shot at on behalf of Queen and Country for well over a decade now. Time to make make locking horns with AQ and the Taliban a part-time job and get back to locking horns with some bison, although I'm not sure that's the safest move. If you get caught in the open by some lunatic with an AK, there's a remote chance he'll actually hit you. If a bison bull catches you out in the open and decides to kill you, you're dead! I've spent the last 7 years watching tracer float past and inspecting the odd bullet hole while Dad's been collecting separated ribs, back injury and near-death experiences. I think he's been having more fun :beatdeadhorse:. Anyway, back to the bike, Here are the two joins close up once I'd cut the pipes close to the join. As you can see, a pretty crap job done here. No attempt at all to produce a blended join. I don't expect performance joints from £320, but this is amazing! Here are the joints after I've ground out the restrictions and radiused the corners as well as I can (without breaking through the weld and adding extra metal). If I had more time I'd re-joint the pipes, but I need to get back on the road. Any more can wait for winter and perhaps I'll jig the downpipes and then build a 4-2-1 out of this. We'll see. Here is the finished component before re-welding the join pipes. And here is the re-welded item. Welds aren't pretty (I'm a bit out of practice) but they're solid, seal well and no overpenetration to give more restrictions inside the pipe. Considering the state of the joins as they came, I figure this is a 200% improvement. Now all I've got to do is get the old exhaust off without breaking any bolts/studs. Any good advice for me on this job would be gratefully received. Link to comment Share on other sites More sharing options...
SEBSPEED Posted July 15, 2010 Share Posted July 15, 2010 Now all I've got to do is get the old exhaust off without breaking any bolts/studs. Any good advice for me on this job would be gratefully received. Nice work opening the joints back up to an acceptable level. Spray the studs liberally with PB Blaster a day or two before putting a wrench to them, and don't ride the bike in between(you'll burn the oil off). Use a 10mm socket where possible, instead of a 10mm wrench, to get a better bite on the stud nuts and a more even/straight torque application. Link to comment Share on other sites More sharing options...
Member Contributer InterFester Posted July 15, 2010 Member Contributer Share Posted July 15, 2010 That looks at least 250% better. I haven't welded SS with my Mig yet so I won't criticize your welds. Looks strong. Link to comment Share on other sites More sharing options...
JES_VFR Posted July 16, 2010 Share Posted July 16, 2010 Your welds look fine, if they are bothering you that much you could always hit em with a flap wheel to clean them up a bit. as for removing the restrictions, nice job, who ever put those together did not even make a real attempt at matching holes. I've jigged up a couple of really weird merged connections (for a turbo kit) and an x-pipe or two for cars. The guy who does my welding is always telling me I should just learn how to weld and finish the job myself. I would not have left that much of a mess behind. I would have had a small lip left because I'd be leaving enough metal for Ceasar to weld, but we talking 1/8 to a 1/4 inch tops, not that. Poor quality control like that makes me want to do something crazy like apprentice with Ceasar and then start bending my own stuff. Link to comment Share on other sites More sharing options...
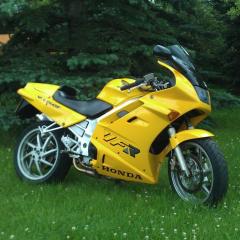
93 VFR750 RC36 Posted July 25, 2010 Author Share Posted July 25, 2010 HOO-BLEEDING-RAY!!!!!!!!!!!! It's on. :fing02: After snapping a couple of exhaust studs (see my other post) and suffering the pain of dealing with that (luckily no head-off-bike to drill pain), it's now on with new studs and SS nuts. I also took the opportunity to drop in the modified 929 shock (spring for me + Racetech Gold valves + extended clevis for VFR) from Jamie Daugherty. What a beautiful piece of work that is. Anyway, I digress, this is an exhaust post. Here are a few pictures, in no particular order: I have only one problem to solve now. The kickstand just taps the exhaust when it's up. It'll rattle when ridden so I'm going to have to sort that out somehow. The kickstand is pretty wobbly so I may try to re-bush the bolt. It's only hitting because the stand can wobble about 3/4" at the end. As for the exhaust, apart from the bloody awful joins that I've already shown you, I'm actually impressed. This exhaust has significantly fewer bends and odd joints than the stock RC36 exhaust. The welds are smoother and, apart from those two mentioned, there are fewer restrictions at any of the welds etc. The OEM exhaust isn't actually all that pretty in workmanship. The internal welds at the head mating ends of the downpipes are rough and untidy, the Sandy ones are works of art. On the back half, the OEM header from the head to the downpipes is definitely the most restrictive part of the system with edges and bumps easily felt with a finger. If I had the engine out, I'd have taken it off too and ground down the restrictions and radiused the welded joints. In summary: It's Stainless and Shiny It's Left Exit It's not rusting and about to fall off It's 1/2 the price of a Motad I got to practice my grinding and welding I can't wait for my jetting kit to arrive so I can hear her sing! I'll keep you all posted on progess with the rest of the bike in a project thread. I've just been given a short notice (3 weeks) posting back to one of my old squadrons as a flight commander so I've set myself a goal of having it painted and roadworthy so I can ride it in on day 1. Later, Stew Link to comment Share on other sites More sharing options...
Member Contributer jaimev34 Posted August 10, 2010 Member Contributer Share Posted August 10, 2010 So, how does she ride? How's the power?? Nice work! Link to comment Share on other sites More sharing options...

Recommended Posts
Archived
This topic is now archived and is closed to further replies.