Jump to content

I am in deep now!


HispanicSlammer

1,713 views

gallery_491_5217_360974.jpg

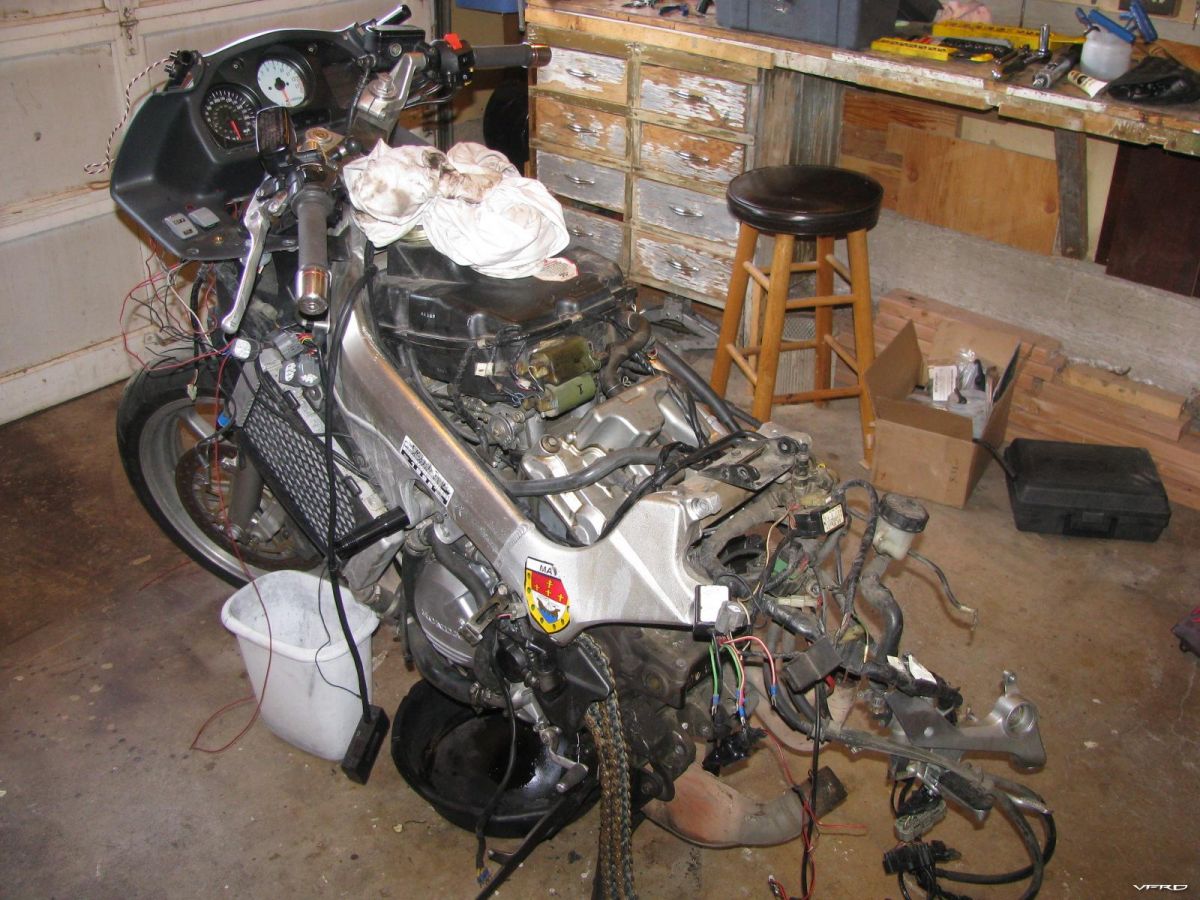
OMG I am in deep now everytime I take somthing off I find somthing else wrong

I keep delving into this bike deeper and deeper and finding all sorts of problems, I know my rear brake has been dragging so I decided to get some new parts and rebuild it. It was a mess, the rubber seals were hard as rocks, and the bellows covering the slider pins were torn and the pins were covered in caked on brake dust not sliding at all.

gallery_491_5217_123926.jpg

rear brake rebuild replaced the seals, pads, bleeders, cleaned up and polished the pistons

gallery_491_5217_399308.jpg

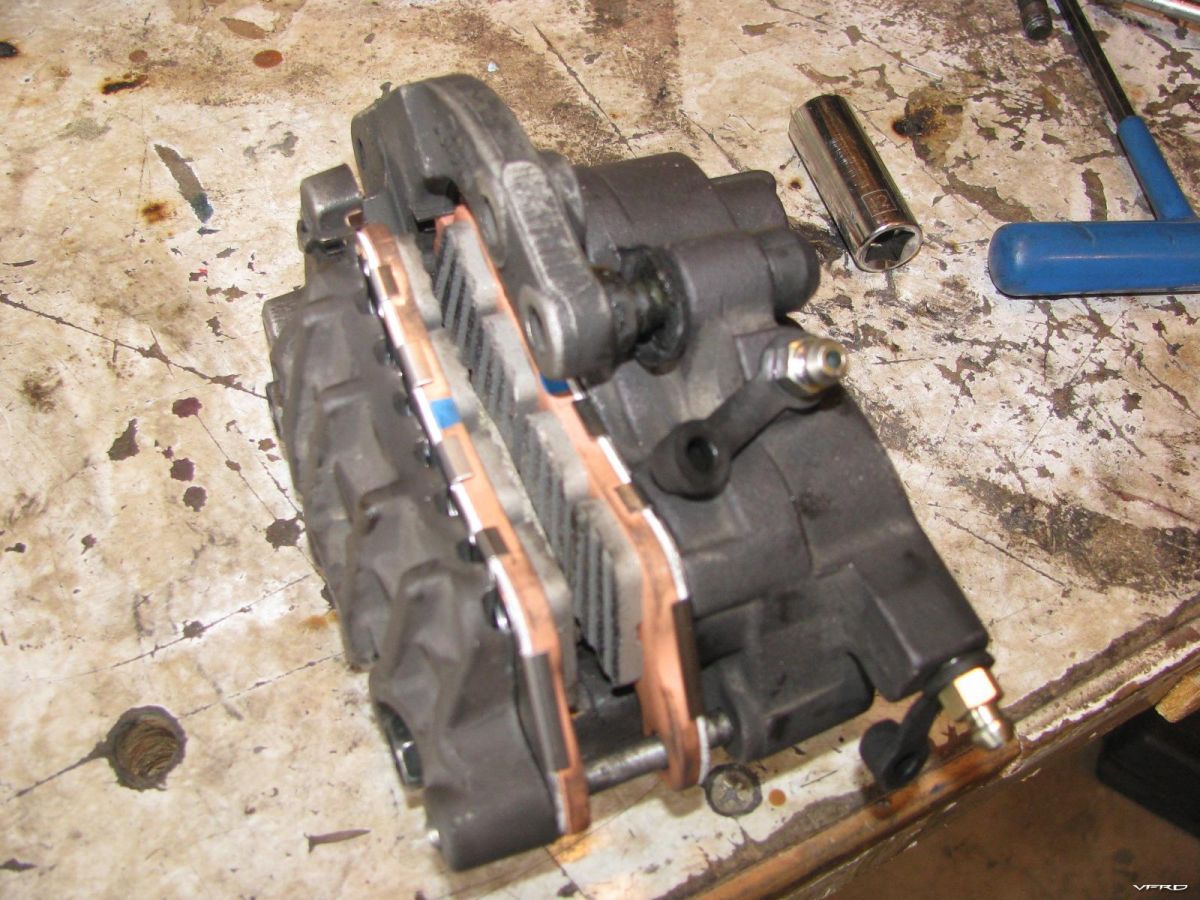
One rebuilt rear brake caliper high temp grease on the sliders, new bolts, new pads, new bleeders, new seals.

I just about got that done and decided to check the swing arm and it was slightly loose when moving side to side and indication that the bearing are shot. So I took it off too, found about 4 inches of caked on oily dirt on the top and side of the swing arm it was just a mess. When I took the axle out I noticed it was in awful shape partially rusted and I think it was the issue since it looked worn where the spacers fit. I run my fingers across the needle bearings and if felt like it was full of grime, the other bearing on the other side seemed fit though. I ordered new bearings, new axle and new spacers cause I am not sure where that play was comming from, along with new dust seals. I have no idea how I am going to get the needle bearings out? Or press in new ones? I dont have the right tools for that.

gallery_491_5217_329149.jpg

Swing arm removed she had a little play in the pivot axle!

Some good news I got my wheels and hub back from the powder coater and they look great!

gallery_491_5217_156900.jpg

Powdercoated hub it was looking rather dull so I had it done too

gallery_491_5217_80412.jpg

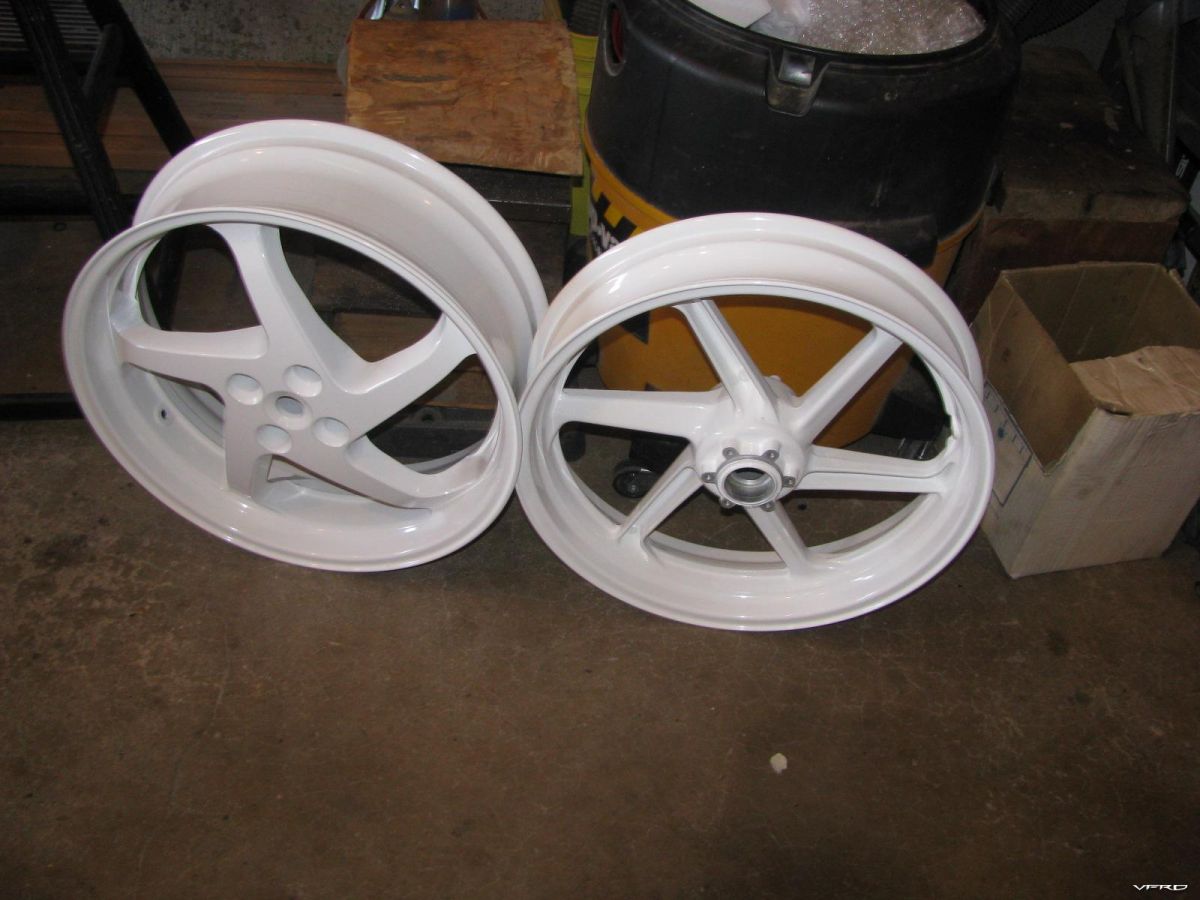
Wheels just back from the powder coater Spectrum Powder Works here in Colorado Springs - loving how they look

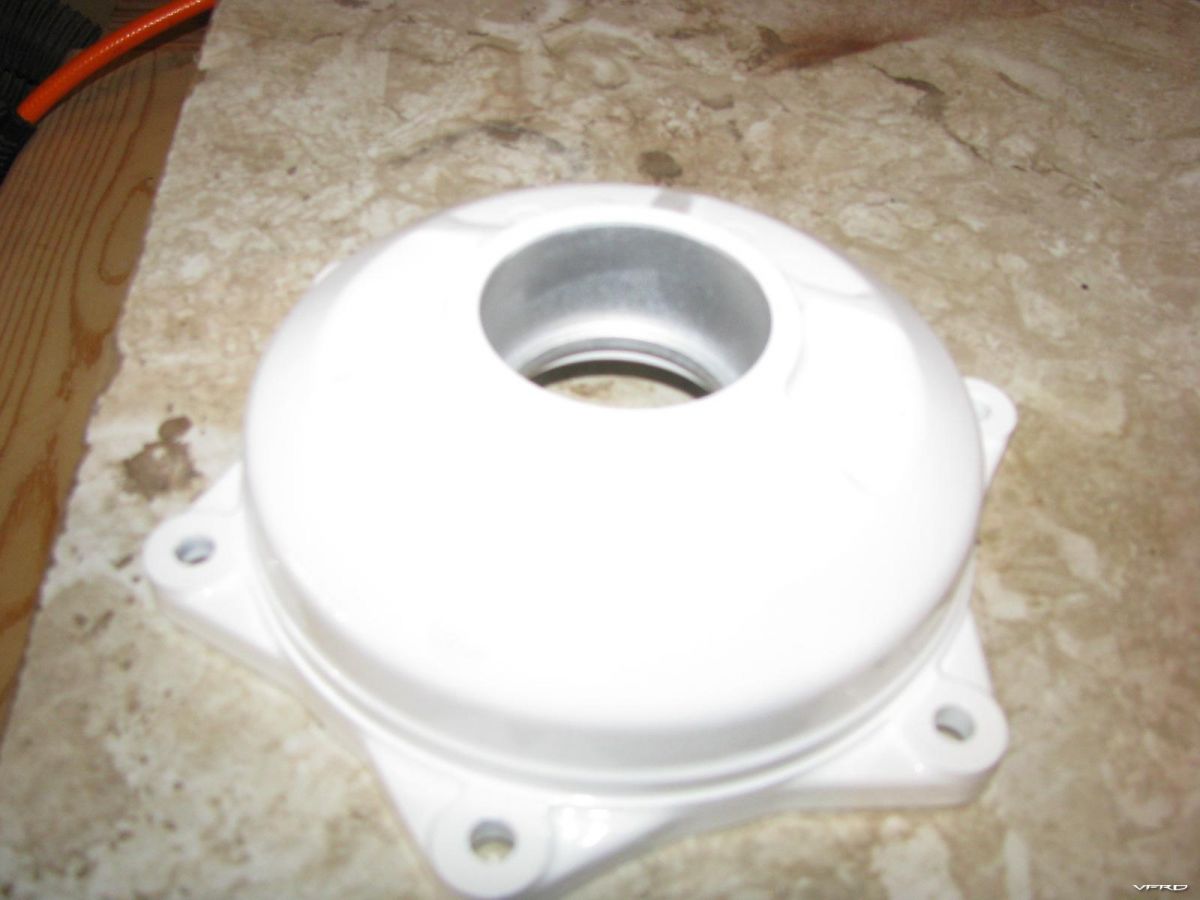
I got bored with getting greasy so I cleaned up and took a nap, I dont have the parts in yet to start putting it back together and I still have to get that darned broken header stud out! I ordered new studs and a carbide drill bit since my bits dont seem to be able to get the job done, I really dont want to take the head off and take it to a machine shop to get that stud out - hopefully that drill bit will do the job! I had to keep my parts orgainized so I put the little washers, seals, bolts, nuts, connectors and what nots into little baggies seperated by what they came off of. I did manage to get the stator back in and put the new stator cover on with a gasket - should not leak I treated it with a thin coat of yamabond 5 and let it dry like it says to do on the tube. Lots of work left to do its takeing nearly all my free time off work, but I enjoy it!

gallery_491_5217_348665.jpg

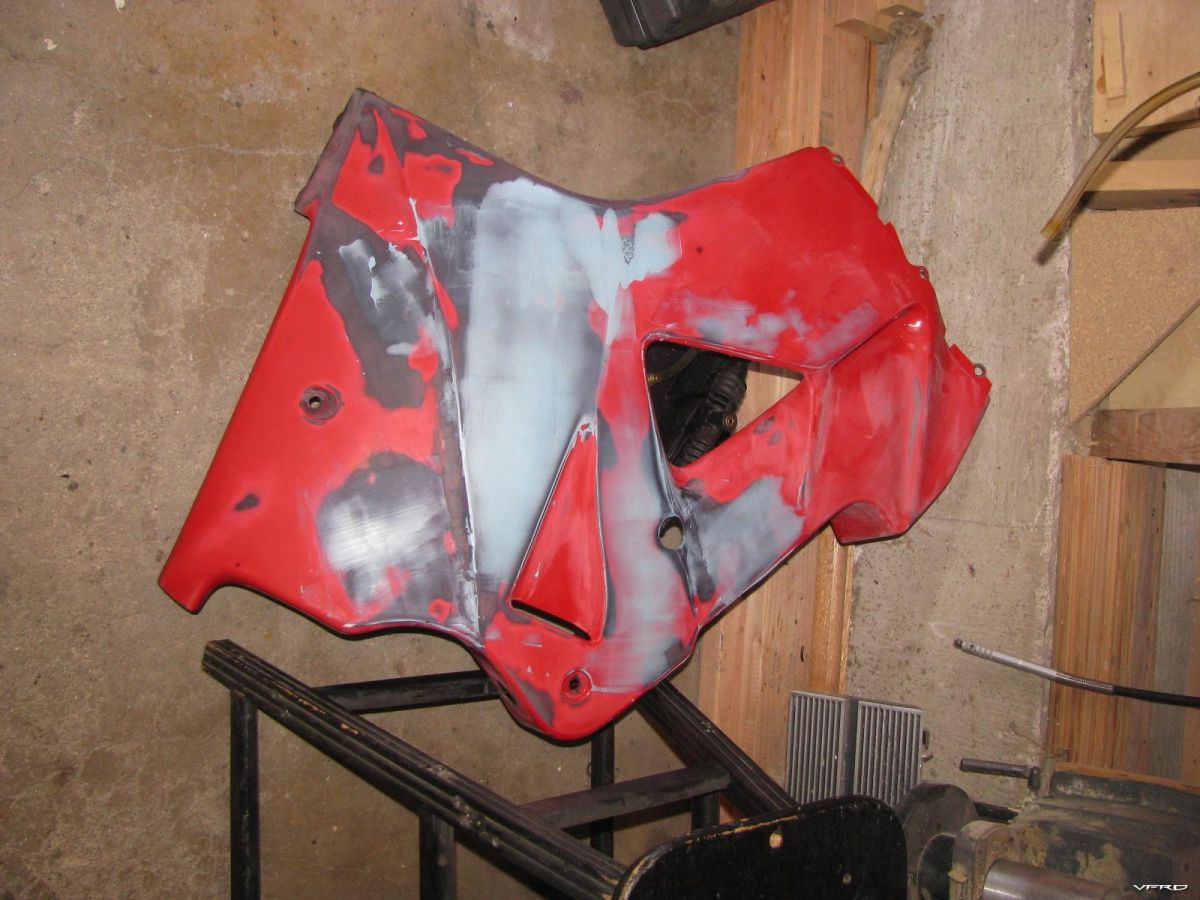
filling in sratches and holes with poly flex slowly getting the PITA job done of repairing plastics

RECAP OF WORK DONE AND WORK LEFT TO DO

  • fork rebuild - new seals new oil done
  • inspect head bearings - done
  • bought new wheels - stripped and powdercoated - installed new bearings and dust seals done
  • replaced stator cover - reinstalled inspected and tested stator new gaskets repaired oil leak done
  • removed old accessory wires - rework heated seat with a new heat troller, reroute wires in a common conduit.
  • find a better spot for the pc-usb
  • rework the autovox unit
  • installed two powerlets center post for the garmin zumo, and rear kit for my heated vest - wired up a side plug adaptor

Yet to do

  1. repair broken header studs install new header gaskets
  2. replace bearings in the ecentric and swing arm pivot axles degrease that unit
  3. replace the crappy plastic chain gaurd and hugger
  4. reupolster my seat with new leather or leather like matierial
  5. replace worn foam in the seat
  6. finish repairs to the plastics
  7. complete paint stripping on the tank
  8. sand and prime the plastics and paint
  9. replace the fuel filter since I have the pump removed
  10. PAINT THE BIKE
  11. GET IT BACK TOGETHER CORRECTLY

4 Comments


Recommended Comments

Miguel, to get the needle bearings out, you can use a socket that is just the right size to barely fit inside the swingarm hole. Hammer on the socket as a sacrificial part.

As for the roller bearings on the front right of the swingarm, there is a circlip in there, you'll need a pair of circlip pliers for that.

You may need to get the needle bearings from Honda (possibly no choice?), but the round roller bearings for the swingarm and eccentric you should be able to source from an industrial bearing supply house much more cheaply.

Try this list:

http://maps.google.ca/maps?sourceid=ie7&rls=com.microsoft:en-US&oe=utf8&redir_esc=&um=1&ie=UTF-8&q=bearings+colorado+springs&fb=1&gl=ca&hq=bearings&hnear=colorado+springs&view=text&ei=BemeS4bRMYbosQOW2bCdCw&sa=X&oi=local_group&ct=more-results&resnum=1&ved=0CA8QtQMwAA

I take my swingarm off and regrease the bearings about every second winter, just so that everything stays in nice shape. I do the steering head bearings and check the front end during the inbetween winters.

It's a lot of work, but you don't end up with nasty surprises and rusted solid components. I've seen conventional swingarm bikes with the axle completely welded in place from corrosion.

During reassembly, I put a THIN coating of grease on the each of the swingarm pivot bolt, the rear axle, and the front axle. That keeps them from rusting solid in place.

Link to comment
  • Forum CEO

Yea the bike was in need of some loving! I lubed them up a few years ago but I suppose the axle got some road salt on it - shoot 130K miles or so? In any case new seals and new axle new bearings are coming. I hope I get this done in time for the Arkansas meet. My Ohlins had a blown out hydraulic collar worn out so it wasn't working. I sent it in for rebuild Ohlins just replaced the collar. I suppose that is why my bike was pushing in the corners during the Kansas meet! The sag in the rear was at 44mm when the front was at 35mm! When I got home I twisted away at the remote preload and nothing! It is a wonder I could ride it well at all~

I check for play every time I lube the chain this was the first time I had any play in the swing arm and it was a good deal of it, enough to make it feel unstable riding. Must have been 1/4 inch at the wheel! It was staggering how bad it got in such a short period.

Now I need a new hugger too, I dont want to reuse the oem nor that crappy plastic aftermarket thing. I need to hit up ryvicko to see what hes got by way of huggers?

Link to comment
  • Member Contributer

Miguel,

If you can find a left handed carbide drill bit for the header stud removal, you may have better luck. When you use a left handed drill bit, as it drills it is also trying to unscrew the broken stud. Drill carefully whatever you do though. A broken carbide drill bit is hell to get out of a broken stud. Hope you get it together for Arkansas. Lodging is available at our house if you need it on the way out or back.

Link to comment

Now I need a new hugger too, I dont want to reuse the oem nor that crappy plastic aftermarket thing. I need to hit up ryvicko to see what hes got by way of huggers?

The Harris Huggers like mine also come in black fibreglass, much cheaper than CF.

If I had've known, I could have ordered two when I got mine, and reshipped a fibreglass one to you.

Oh well.

Link to comment
Guest
Add a comment...

×   Pasted as rich text.   Paste as plain text instead

  Only 75 emoji are allowed.

×   Your link has been automatically embedded.   Display as a link instead

×   Your previous content has been restored.   Clear editor

×   You cannot paste images directly. Upload or insert images from URL.

×
×
  • Create New...

Important Information

By using this site, you agree to our Privacy Policy.