checksix
-
Posts
320 -
Joined
-
Last visited
-
Days Won
1
checksix's Achievements
")


-
They may be counting the same revolutions, but the output is different due to the software involved. Ok, I get it now. The factory electronics take a single signal from the sprocket and calculate two different quantities: speed and mileage. The mileage is exact but the displayed speed is (say) 5% too high, presumably as a favor to the consumer to reduce speeding tickets (or whatever). So without modifying the electronics you can only correct one or the other, not both.
-
I don't understand. How can the speedo accuracy change but not the odometer? They're both driven by counting revolutions of the output sprocket.
-
This was a great thread to read. Thanks for sharing a piece of history with us. Good review here: http://raresportbikesforsale.com/featured-listing-1986-honda-vfr750r-rc30/
-
I've got one of these on my CBR. It's tiny and sits tucked away out of sight. The programming is a bit odd (just one button and one led) but not too hard to figure out. Set it once and forget about it.
-
Google "torocharger".
-
What a great first post. It's always good to see bike resurrections like this. Nice job and good luck with your project.
-

All Vfrs... Check Your Water Pump "weeping Hole" - Now!
checksix replied to Franko!'s topic in Maintenance Guides
Just use a flashlight and one of those little round inspection mirrors on a telescoping wand and hold it under the water pump to see the weep hole. -
Factory Pro Evo Shift Star Kits For Vfr800 Available Again!
checksix replied to Rush2112's topic in Modifications
My '98 came with one of these installed by the previous owner. It's very nice. Clean, precise "snick" shifts every time. -
Roland Sands, step aside. There's a new builder in town. Beautifully finished. Can't wait to see more pictures.
-
I stop in there once in a while, but mostly ride by. Most of the familiar faces seem to have been replaced by strangers these days :( Using this: http://www.marcparnes.com/Honda_Motorcycle_Wheel_Balancer.htm
-
It's so sad when people just leave a bike to die like that. Good luck bringing it back to life!
-
5Th Gen - Why Not Complete Cbr 954 Front End Swap?
checksix replied to Pumee's topic in Modifications
That looks so nice. The white with a little bit of understated red trim and graphics looks perfect. In addition to mellodude's windshield question, I was wondering who makes those hand grips you've got on there? A set like that came on my CBR and I find the "fat" style really comfy. I'd like a set for my VFR, but don't know what brand they are. -
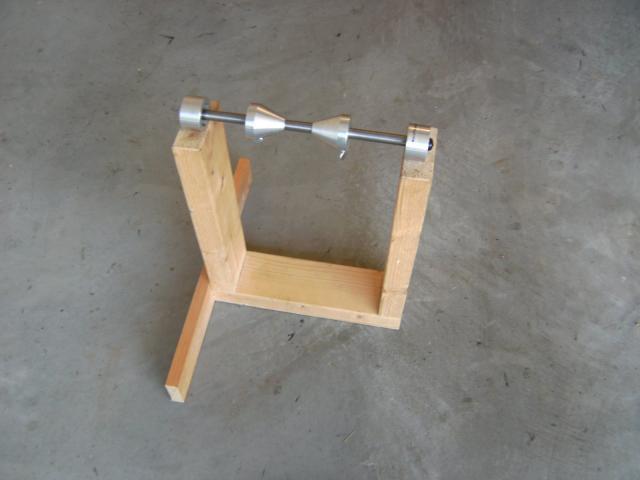
The balancer has really good bearings and the heavy spot on the wheel settles at the bottom, no shaking or spinning needed.
-
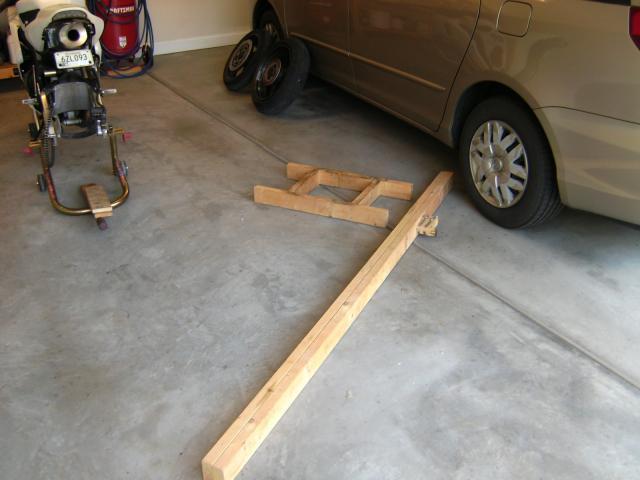
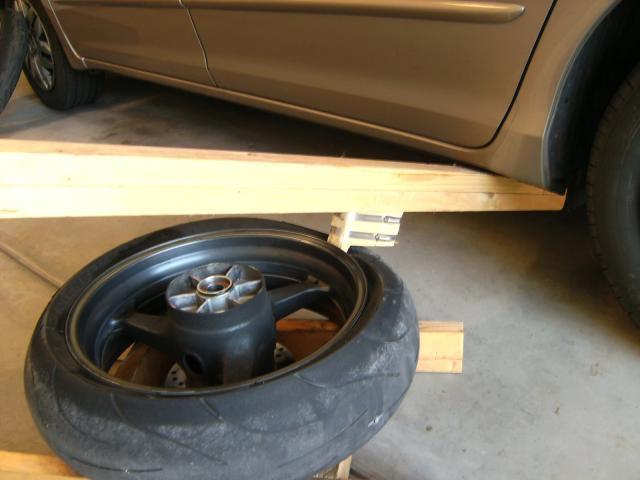
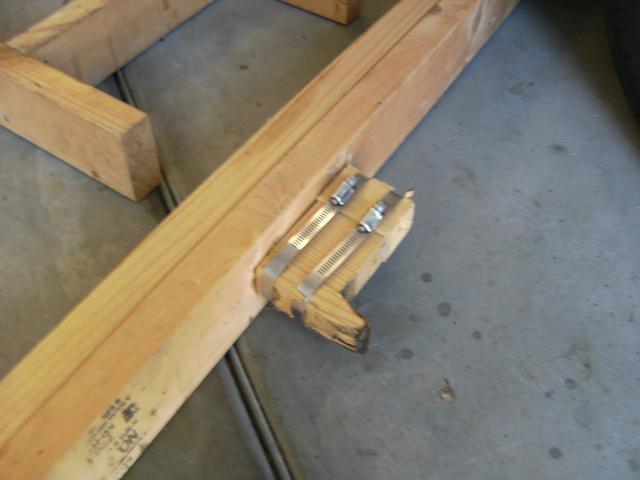
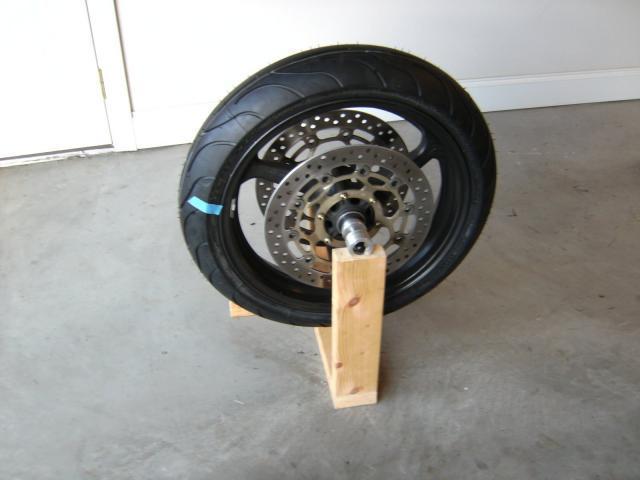
I go through sets of tires fairly quickly and I like to change them myself, both to save money and for the convenience of doing it in my own garage. I'm also a cheapskate, so rather than buying a tire changing machine I just made some "tools" out of 2x4's. I figured they might be of interest, so I thought I'd post some pictures. A simple box shaped stand keeps the wheel off the ground and protects the brake rotor while working on the tire. The bead breaker is just a pair of 2x4's glued and screwed together, with a wedge shaped section at one end: Hose clamps prevent the wooden wedge from splitting: A handy minivan is used as the anchor of the lever arm (some people use a board bolted onto a wall): After breaking the bead, a few simple hand tools are used to remove and replace the tire. Tire irons, plastic rim protectors, and some tire lube get the job done. The real secret is the tire lube. It helps the rubber to slip on and off the rim of the wheel and makes things much easier. I got a jug of "RuGLYDE" at my local NAPA auto parts store. A small tin cup and paint brush are used as an applicator: I also made a balancing stand to hold a Marc Parnes balancer: The balancer comes with cones for standard wheels. He also sells a special large cone for the VFR rear wheel. Here's what the balancer looks like in use: It usually takes me about 3 hours to change a set of tires. That includes disassembly, cleaning, degreasing, inspecting, reassembly, and torquing everything. The actual bead braking and tire mounting goes quickly. It took me awhile to learn how to use the tire irons. The first few attempts produced lots of airborne irons and cursing, but now I can get a tire on and off in just a minute or two. It helps to lay the tires out in the sun for a few minutes to warm up the rubber. Liberal use of the tire lube helps too. The only "cost" for me was the tire balancer (about $100 if I remember correctly - I got it years ago). All the other materials were just laying around. One advantage over a heavy dedicated tire changing machine bolted to the floor is that all the wood parts here are lightweight and store away in a corner or under my workbench when not in use.

-
I'm curious, has anyone ever tried cleaning the disc brake bobbins to "unbind" them so the discs can float properly in the carrier? https://www.youtube.com/watch?v=1qoPqN2GBdw I'd never heard of this before but it seems to make sense and would be easy to try.